PHP has become the most popular web language in recent years due to its ease of use. Also due to its ability to quickly construct feature-rich web applications. Meanwhile, to design and consume APIs, dynamic, interactive, secure, and efficient websites require a robust tool suite. So, to create content that enhances discoverability and helps achieve business goals, we use Laravel for API development. In this article, we’ll look at how to use Laravel to create and test a robust API.
Requirements
Consider the following technologies as we develop our Laravel APIs:
PHP
Composer
Laravel
When it comes to developing our API, we’ll use PHP. There are other ways to install PHP on our machine.
A package manager for PHP is Composer. You can declare your application’s requirements, and it will download them for you. Let’s get Composer up and running.
To download, go to this link:
https://getcomposer.org/download/
To download, go to this link:
https://getcomposer.org/doc/00-intro.md
Now we can install Laravel by running the Composer command:

The composer will download and install Laravel. And along with it any required dependencies when you execute this command. Here we are talking about the ones establishing a project for us to work on. You can quickly read the entire installation.
Documentation link
https://laravel.com/docs/9.x/installation
After everything has been downloaded, use the following command to test the installation:

Planning the API
Build an API with Laravel 8 crud with a passport authentication. Example; This tutorial will show you how to create API using Laravel & passport auth. Passport auth is typically used to convey information that can be trusted and confirmed using a digital signature.
Use HTTP verbs/methods as actions in RESTful APIs, and endpoints as resources acted upon. The HTTP verbs will be used for their semantic meaning:
First, let’s define API method:
GET: retrieve resources
POST: create resources
PUT: update resources
DELETE: delete resources
Let’s now start building a robust RESTful API in the Laravel 8 app using Passport Authentication. We will also show you a fully functional CRUD for user products that use the API.
This Laravel 8 rest API crude tutorial with a passport; Using Passport Authentication would create an API like this
Login API
Register it
Get User Info API
Product List it
Create Product API
Edit Product API
Update Product API
Delete Product API
Rest CRUD APIs in Laravel 8 With These 8 Steps
Download Laravel 8 App
Database Configuration
Install Passport Auth
Passport Configuration
Create Product Table and Model
Run Migration
Create Auth and CRUD APIs Route
Create Passport Auth and CRUD Controller
Test Laravel 8 REST CRUD API with Passport Auth in Postman
Download Laravel 8 App
First of all, Open command prompt and run the following command to install laravel 8 app:

Database Configuration
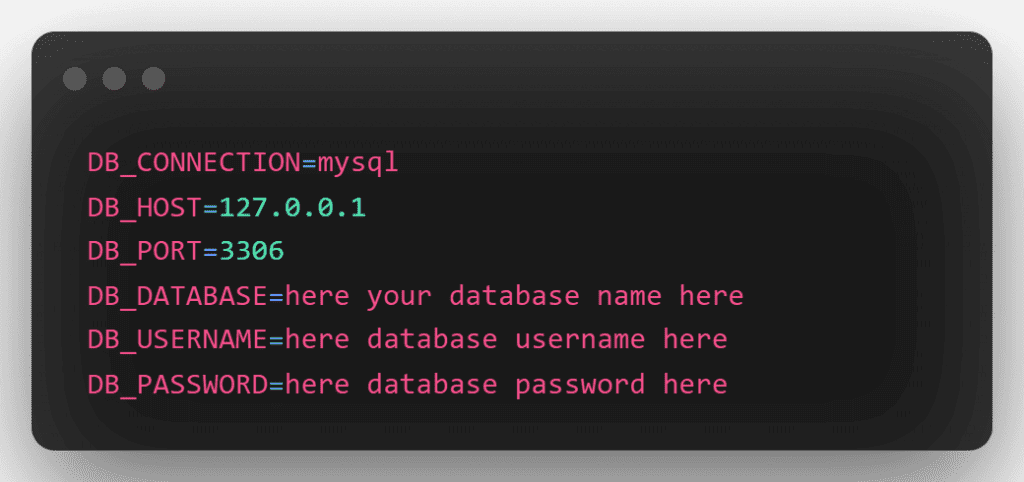
Now, navigate to the root directory of your Laravel restful authentication API with passport tutorial project that you just installed. Then open the .env file. Then, as follows, add the database information:
Install Passport Auth
Run the following command to install the passport package:
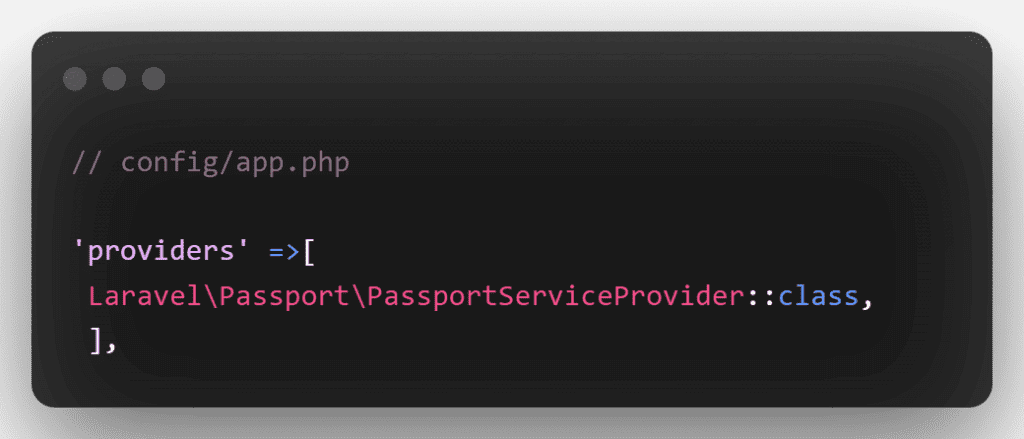
To produce passport encryption keys, you’ll need to install Laravel. This command will generate the encryption keys required for safe access token generation:

Passport Configuration
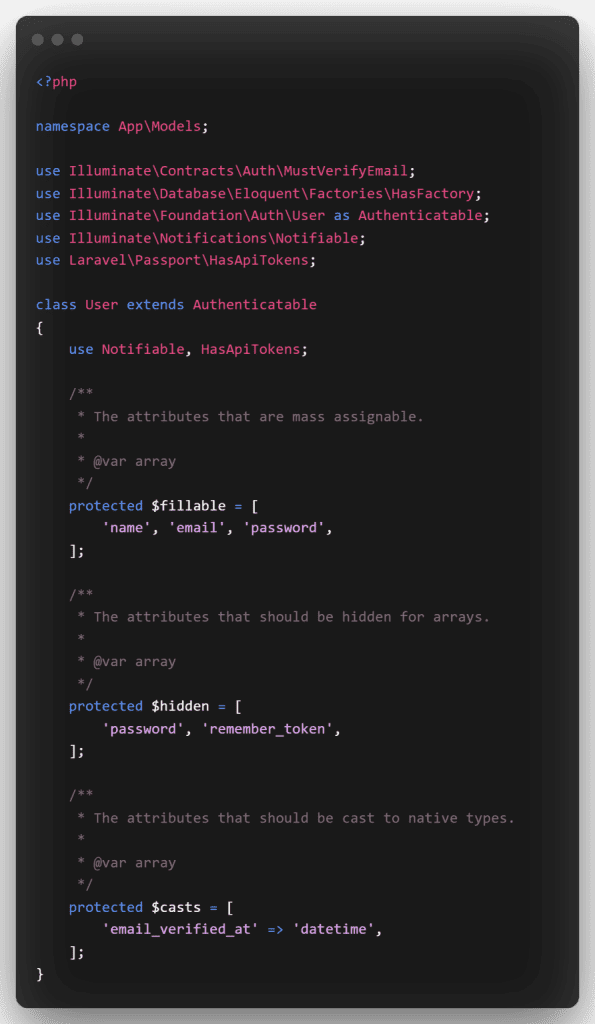
Navigate to the App/Models directory and open the User.php file. Then, in User.php, add the following code:
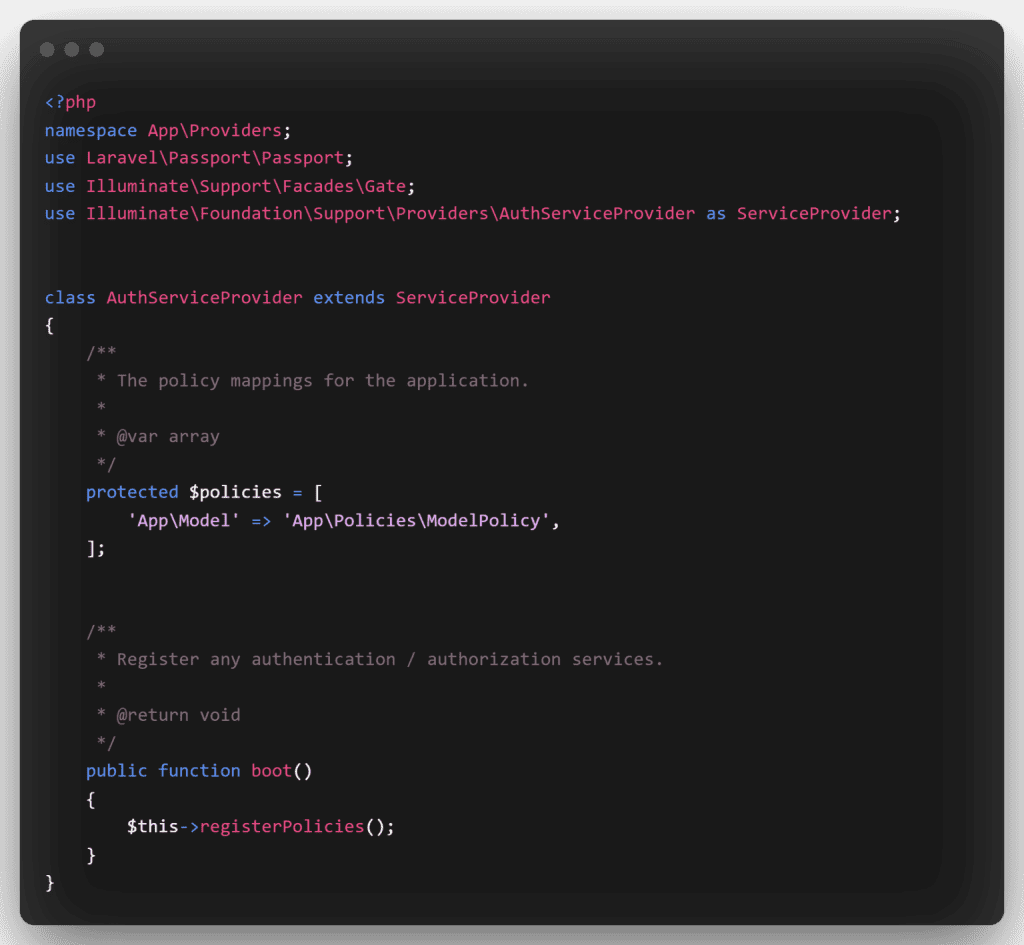
Next In App/Providers/AuthServiceProvider.php, create passport routes. Update this line in App/Providers/AuthServiceProvider.php => Inside the boot method, register Passport::routes():
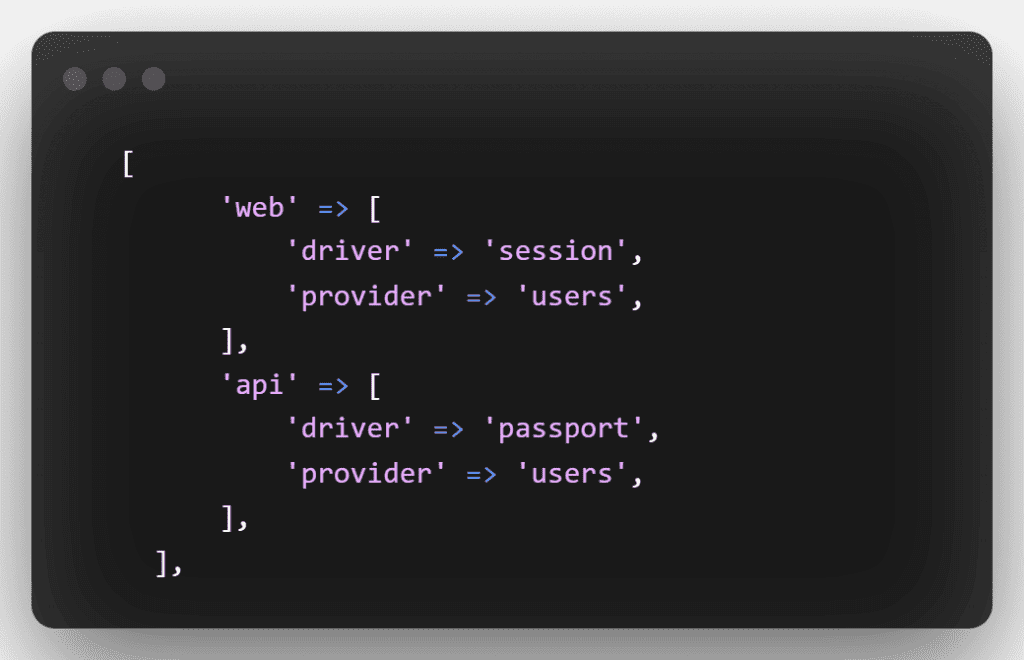
Next, open the auth.php file in the config/auth.php directory. Then change the API driver to passport for the session. Put the following code in API: ‘driver’ => ‘passport’
Create Product Table and Model
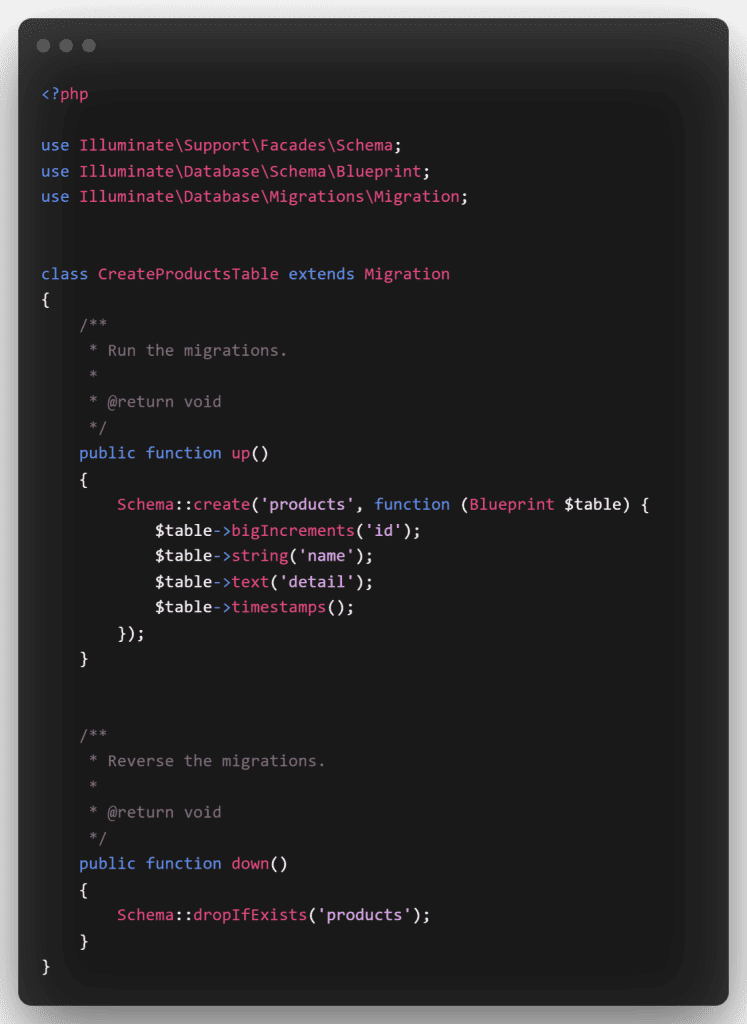
To build a product model and migration file, open a terminal and type the following command:

After that, open the create products table.php file in the database/migrations directory. After that, add the following code to it:
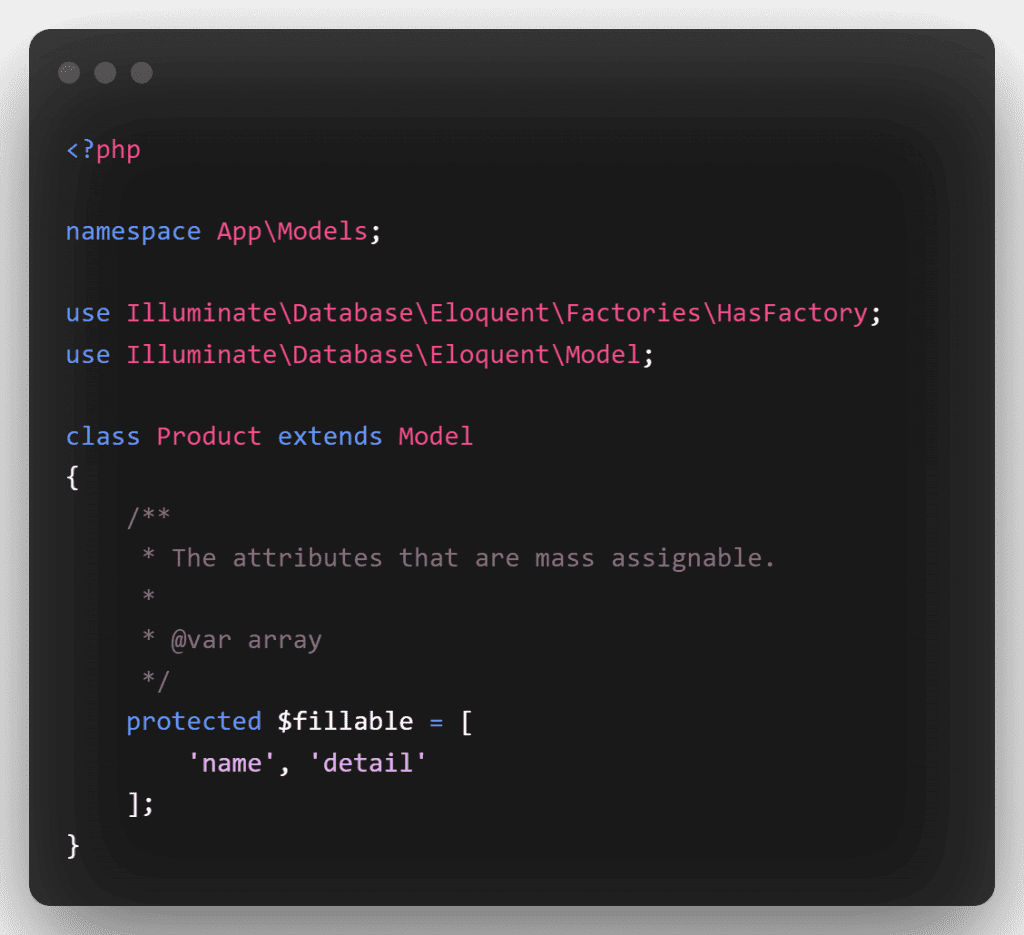
Then, in the product.php file, add the fillable property: navigate to the app/models directory, open product.php, and add the following code:
Run Migration
In this phase, you’ll use the bellow command to migrate your data. This command generates the following database tables:

Create Auth and CRUD APIs Route
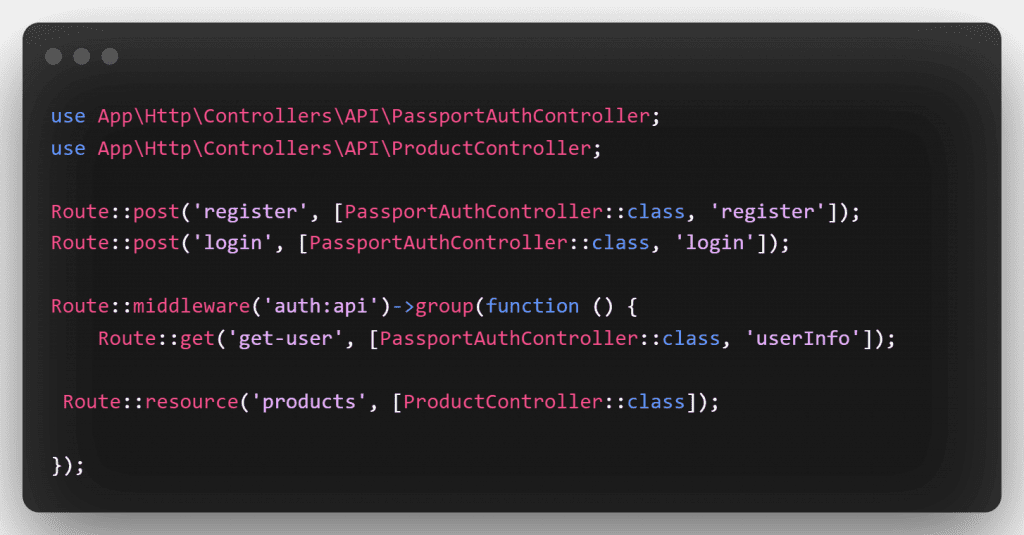
Create the rest API auth and crud operation routes in this phase.
To begin, open api.php in the routes directory. Then, in the api.php file, edit the following routes.
Create Passport Auth and CRUD Controller
In this step, Create a controllers name PassportAuthController and ProductController. Use the below command and create a controller :

After that, in PassportAuthController.php, create several authentication methods. So, open the PassportAuthController.php file in the app/http/controllers/API directory. Also, in your PassportAuthController.php file, add the following methods:
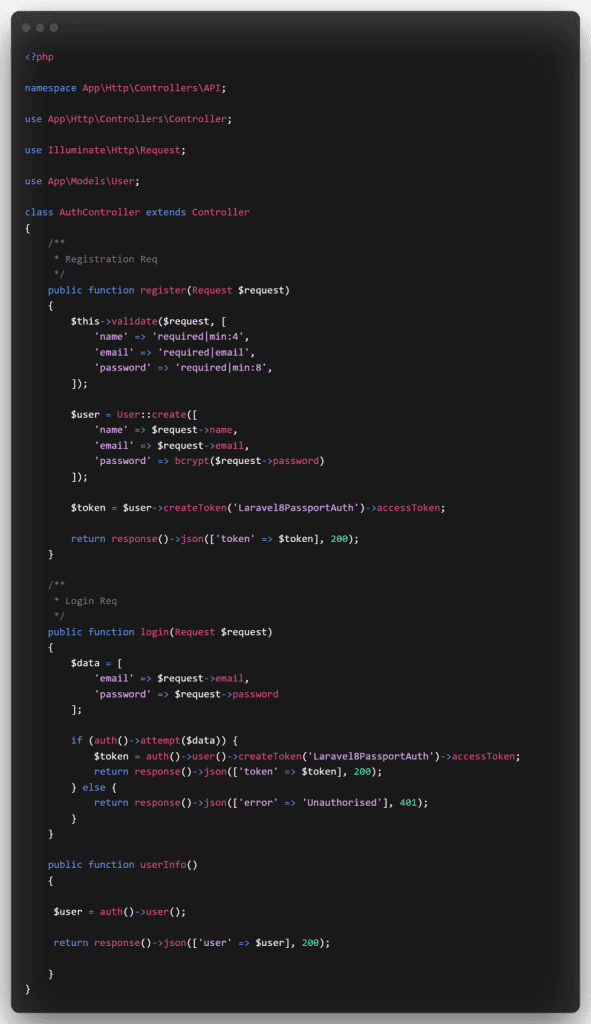
Next, in ProductController.php, create rest api crud methods. So, open the ProductController.php file in the app/http/controllers/API directory. Also, in your ProductController.php file, add the following methods:

Then, to start the development server, open a command line and type the following command:

Test Laravel 8 REST CRUD API with Passport Auth in Postman
1 – Laravel Register Rest API :
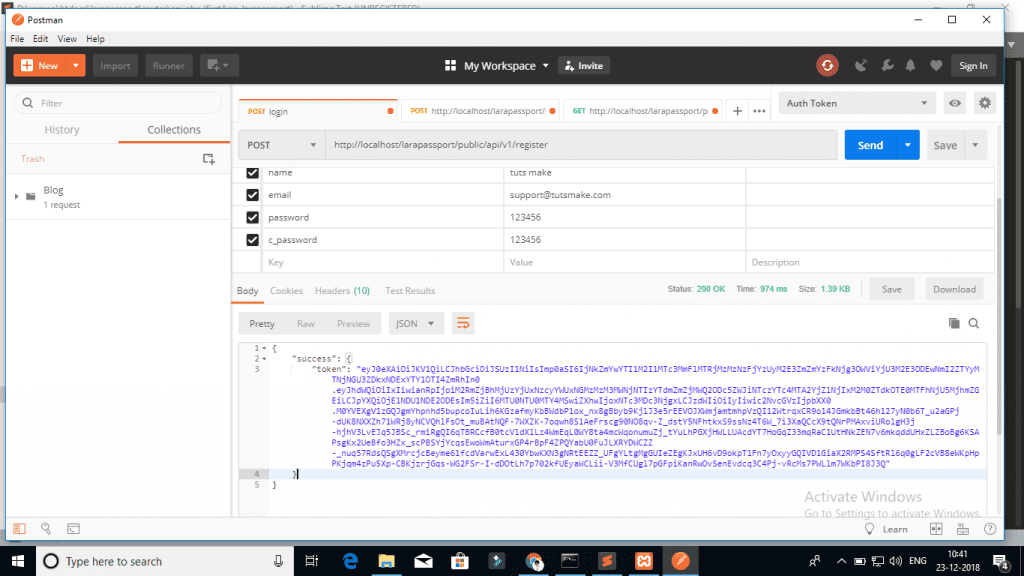
2 – Login API :

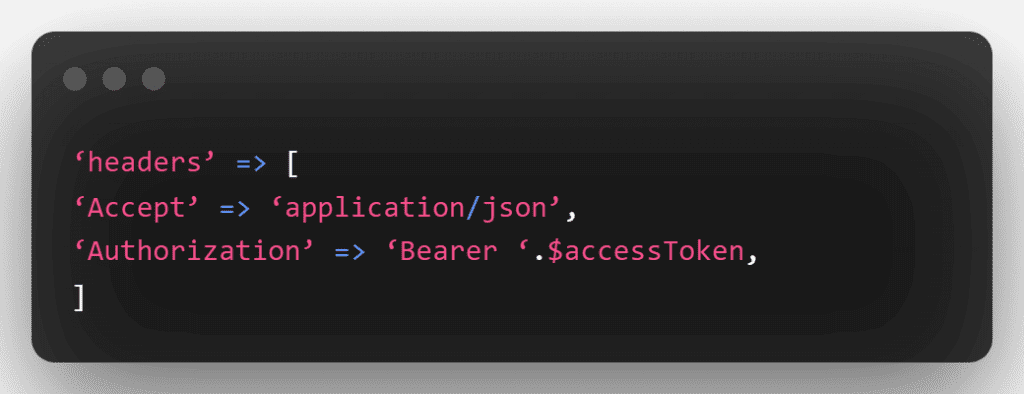
You’ll then use the getUser, create product, list product, edit product, and remove product APIs in the next step. The access token must be given as headers in this api:
3 – Product List API
Method:- POST
URL:- http://127.0.0.1:8000/api/products

4 – Product Create API
Method:- POST
URL:- http://127.0.0.1:8000/api/products

5 – Product Fetch API
Method:- GET
URL :- http://127.0.0.1:8000/api/products/{id}

6
Method:- PUT
URL :- http://127.0.0.1:8000/api/products/{id}

7 – Product Delete API
Method:- DELETE
URL :- http://127.0.0.1:8000/api/products/{id}

A place for big ideas.
Reimagine organizational performance while delivering a delightful experience through optimized operations.

To sum up, PHP is the language that most web developers use. And the software that has recently been the most successful in deploying web applications. You can create efficient APIs in Laravel 8 with passport auth. Also you can use the Postman app to call these APIs, hence making it a very useful language.


